Building a Dry Creek Part 3
The dry creek progress has continued sporadically since the Spring. I have not done much with the creek itself but I have worked on the approaches to the creek and as you can see below a way to cross the creek that doesn't involve jumping!
If you have not already take a peek at earlier progress reports - Update 1 and Update 2
March 2021
 |
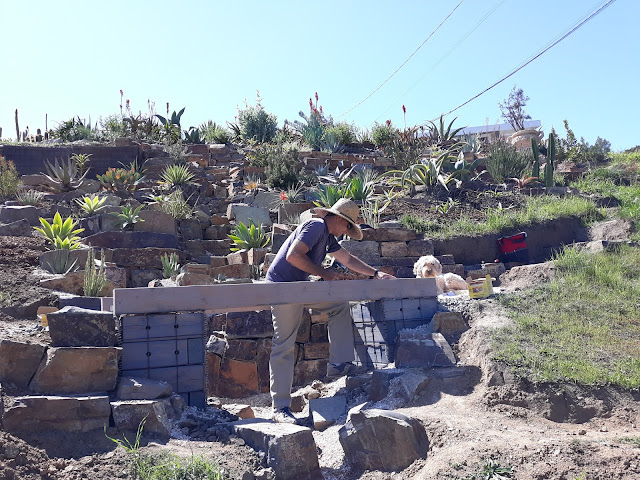
| Securing the 4"x6" beams of our toy bridge |
I spent an evening trying to learn something about the load bearing capacity of various sized beams and bumped into a lot of explanations that were of the "It depends" sort. In the end I decided 4"x6" beams would be more than enough for such a short span and a bridge surface that would rarely need to hold more than 2 -3 people.
 |
| My youngest learning how to use an impact driver |
The wooden treads are left over from a deck we removed in the backyard. The stain I'm applying looked blue on the treads to start but has since lost that hue.
Next Week
 |
| Layer of drain rock goes down over rough grade |
 |
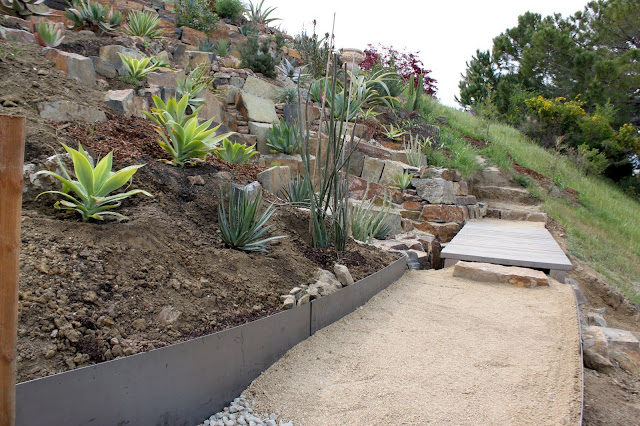
| 14 inch Corten steel edging |
The Corten steel will turn a rusty color similar to the surrounding rocks. I was a little apprehensive about introducing another material to the landscape but decided that it's eventual color change will help the steel blend nicely with the rock and wood.
With the edging in place there was new room for a few more plants.
 |
| On the upper path looking down at the lower path |
Early July
Sometimes life happens and gets in the way - but by mid-summer I was ready to restart this project.
 |
| More path construction in progress. |
It always feels good to create new planting space. I keep relearning the lesson - create the space first, then buy the plants. Each of these pieces of Corten steel edging is 4 ft long - so yes that is 4 ft of new planting space complete with amended soil!
 |
| more rocks... |
A few months ago I removed several yds of the hill - in fact I had to rent a jack hammer because the dirt at a certain point transitions to rock. The plan is to eventually create a garden forecourt but for now it makes a convenient spot to park and sort boulders.
 |
| Some of the larger rocks from the first pallet |
Unfortunately there weren't any really large rocks in these pallets but there are some generously sized, nicely shaped pieces.
 |
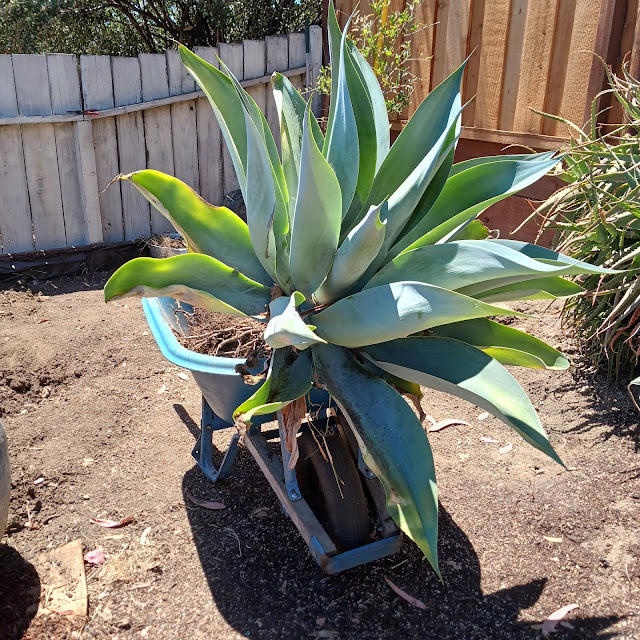
| Agave angustifolia |
Meanwhile, despite the summer heat, the established plants keep on growing.
 |
| Stone steps and wall about 1/3 done |
Another Sunday evening shot after a weekends work. These stairs will connect the upper and lower garden paths. In the background are two Grevillea "Moonlight" which will eventually screen offsite views and were a recommendation by Hoover Boo @ Piece of Eden - thanks!
Pictured below on the opposite side of the bridge is the newest section of the garden. As you can see this is still mid-construction.
 |
| The path transitioning into a rocky trail |
The smaller, crushed rock above is left over from my day with a jack hammer. I sprinkled it on by the shovel full hoping they would help give the larger stones a look of permanence.
 |
| Trail construction in progress |
The stones above act as rough steps but their arrangement is most definitely not ADA compliant. They are supposed to resemble a rough hewn trail.
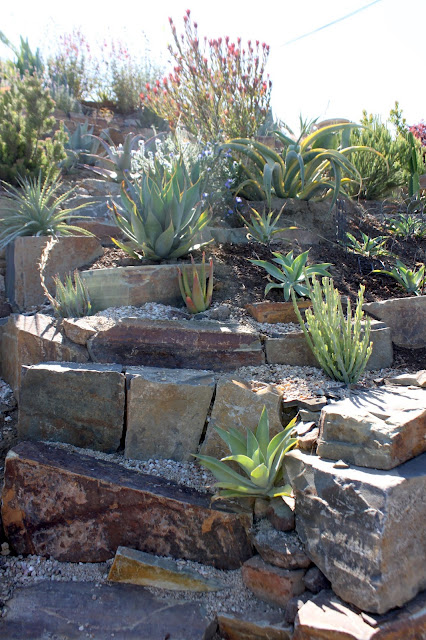
Kenton Seth gave an online talk on Crevice Gardens via the HPSO recently which I found inspiring. I decided to try my own version with plants that will survive in our CA climate (and not appeal to the deer or ants..) One of the points Kenton made was about how the roots of many plants find shelter in the relatively cool and moist soil between rocks. This seems to have played out with the plants visible in the background which are not on an irrigation system.
 |
| Rocky outcrop construction in progress |
At this point I've run out of rock once again - so further progress will need to wait :(
 |
| Time to order more rocks - a lot more. |
It can be hot, dusty and generally miserable out here in the summer when "terraforming" but it's a necessary step before plants can go into the ground. Eventually there will be green in this landscape and I only have to look a few yards away for reassurance.
 |
| Plants after 6 - 18 months in the ground |
 |
| A newly planted Leucadendron argenteum (Silver Tree) |
I couldn't resist planting this silver tree. I bought it a few months ago without a real plan. California's Mediterranean climate in one of the few places outside of it's native South Africa that this gem has a chance at surviving. It's a picky plant so I've got my fingers crossed that this specimen will be with us for awhile.
Until next time - Happy Gardening!


I'm very impressed by your progress, Hans. I feel a little as though I'm witnessing the building of a modern-day equivalent of the pyramids but the plants are better than any hieroglyphics. It already looks great! I'll keep my fingers crossed for the Leucadendron argenteum, which I've long admired but haven't invested in as it gets taller than I think my garden can accommodate at present. I also attended the HPSO presentation on crevice gardening with the idea of trying it on my very dry back slope. The problem I face is getting a large quantity of rock down there as the only access is the narrow and relatively steep concrete block stairway my husband built our first year here.
ReplyDeletethx for the kind words Kris. I know it does seem a little out of control at times - but no one has forced me to stop yet ;) I am half expecting an intervention. Getting larger rocks to inaccessible places can be hard - one of the techniques I considered was strapping them to a custom rock sled (made w/left over 2x6' / 2x4's) and letting gravity move them down the hill - or just hire a couple of strong looking guys to carry them down!
DeleteWow. Just wow. So inspiring.
ReplyDeleteI love that you wrote: "I keep relearning the lesson - create the space first, then buy the plants" and then just a few paragraphs later wrote: "I bought it a few months ago without a real plan"... like a true gardener! I am sending good vibes to your silver tree, a plant I wish I could grow!
thanks Loree. How funny! Yeah - I don't know that I'll ever be able to truly live by that rule - but I'll make a good faith effort.
Delete"create the space first, then buy the plants" Huh??? Really!?!!? Does that actually work?
ReplyDeleteThanks for the update on this amazing project. It's getting better and better. Would love a panoramic shot when it's all completed.
A. augustifolia was very weedy here. Hope it is more restrained for you than it was here.
Best wishes for 'Moonlight' performance--it will take plenty of water, unless your soil is straight adobe. Mine is a small tree now.
Envious of, and best wishes for success with the Silver Tree. They tried one at Roger's Gardens in Corona del Mar, and it wasn't pretty.
'Pisa' which Kris has a glorious specimen of is a great alternative if L. argentea doesn't work out.
thanks. yeah I'm a little worried about the Silver tree - less than a week in the ground and it already looks as if it's suffering :( I saw my first specimen at the SF Botanical gardens 20 yrs ago and was struck it's unique foliage and overall shape. I wanted to at least try growing it once in my life. The Caribbean Agave is pretty weedy (but not as bad as A. lopantha) The one in my back yard most definitely puts off lots of pups - tho very close to the parent when makes them hard to remove - I may regret putting that there - time will tell. The G. 'Moonlight's have been in the ground for several months now and are real troopers! This first year I'm babying them - I generally dump 3 gal's of water on them every few weeks. The deer leave them alone too!
Delete